Everything you need to know about cleaning a laser printer
Is the laser printer you are using slowing down? Or, are you facing issues like overheating, clogging, clattering noise while printing? Well, it’s maybe got some dust inside, needing a cleaning service. A clean laser printer can perform really well when a printer with dust in it cannot serve you well. Here are some tips on how can you clean your laser printer yourself today.
To clean a laser printer, you will need some tools to get the job done.
· Hand gloves: Inkjet printers has print header that is sensitive to hand touch. If you work with the ink head and don't use any hand glove, you may leave some fingerprint to the head and that will make your printer lose its print quality. So, use a pair of good quality hand gloves before you start cleaning your print head.
· Glass cleaner: Glass cleaner can dissolve the dried out and stained colors out of the print head. it will help you remove the excessive colors or stubborn dusts from your printer.
· Printer lubricator: This utility oil can lubricate your printers’ internal components. You should have this and use it on a regular basis to keep your printer work flawless.
· Good quality towel: You will need a good quality paper towel or a piece of cotton cloth that can wipe off the dust from the printer.
· Air blower: You might need an air blower to blow off fine dust out of the printer.
After getting all the tools mentioned above, follow the process below:
1. Switch off the printer and detach the components: switch off the machine, open it and detach all the detachable components from it. All the detachable components should come out gently without creating any pressure on them. Open up the outer cover and gently pool out the cartridge.
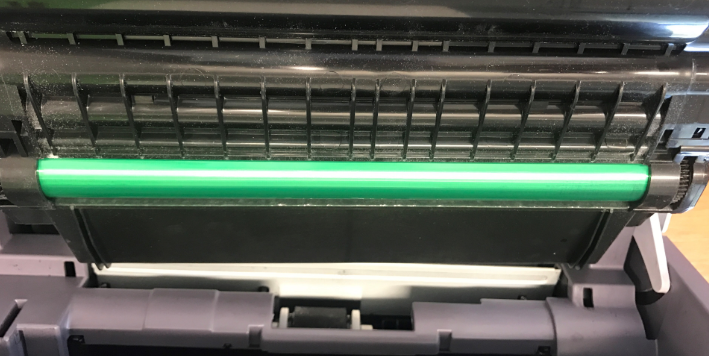
2. Clean the cartridge or the bottle: Once you have your hands on the cartridge or the ink drum, you might find it messed up with dust and excess ink. To clean them up, spray some glass cleaner on a piece of paper towel and make sure it's not too wet. You can also use some toner cloth to do the job. Toner cloths are specially designed to attract toner particles from the toner. Now gently start wiping the head and all other area of the cartridge. Remove all the excess ink and dust off the cartridge.
3. Clean the other components and the inner portion: After getting the cartridge cleaned, Now clean the printer housing where all the other components are resting. You may find the inner side full with fine dust if you are cleaning after a long while. Now use the air blower to blow off the dust from the cartridge housing and all the other non-reachable parts of the printer.
4. Try a toner vacuum: you can use a toner vacuum to clean the toner head. Toner vacuums can suck out all the working as obstacles to the printer. Keep the vacuum nozzle for at least 3 seconds for each shaft.
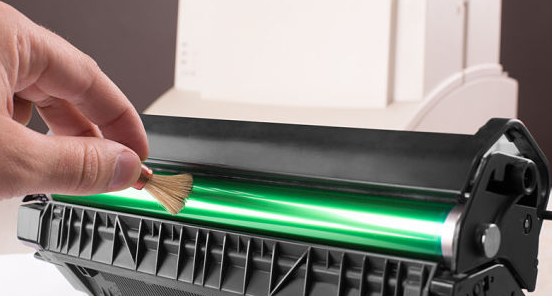
5. Clean the corona wires and the paper roller: Pour a cotton swab into rubbing alcohol and find the corona wires. With the help of the cotton swab, clean the wires and make sure to corona wires as well. this will help to improve the transferring static charge to the paper. Take another swab and scrub the feed roller in a circular motion and clear all the dust that gathered by the roller.
6. Reassemble: After cleaning the printer, reassemble the machine. Don’t put pressure while putting in the parts. They should go in gently without any pressure.
Keeping your printer clean and taking good care of it may not be enough to keep it from breaking up. Make sure to hire a good professional repair service when you are about getting your printer repaired.
· Hand gloves: Inkjet printers has print header that is sensitive to hand touch. If you work with the ink head and don't use any hand glove, you may leave some fingerprint to the head and that will make your printer lose its print quality. So, use a pair of good quality hand gloves before you start cleaning your print head.
· Glass cleaner: Glass cleaner can dissolve the dried out and stained colors out of the print head. it will help you remove the excessive colors or stubborn dusts from your printer.
· Printer lubricator: This utility oil can lubricate your printers’ internal components. You should have this and use it on a regular basis to keep your printer work flawless.
· Good quality towel: You will need a good quality paper towel or a piece of cotton cloth that can wipe off the dust from the printer.
· Air blower: You might need an air blower to blow off fine dust out of the printer.
After getting all the tools mentioned above, follow the process below:
1. Switch off the printer and detach the components: switch off the machine, open it and detach all the detachable components from it. All the detachable components should come out gently without creating any pressure on them. Open up the outer cover and gently pool out the cartridge.
2. Clean the cartridge or the bottle: Once you have your hands on the cartridge or the ink drum, you might find it messed up with dust and excess ink. To clean them up, spray some glass cleaner on a piece of paper towel and make sure it's not too wet. You can also use some toner cloth to do the job. Toner cloths are specially designed to attract toner particles from the toner. Now gently start wiping the head and all other area of the cartridge. Remove all the excess ink and dust off the cartridge.
3. Clean the other components and the inner portion: After getting the cartridge cleaned, Now clean the printer housing where all the other components are resting. You may find the inner side full with fine dust if you are cleaning after a long while. Now use the air blower to blow off the dust from the cartridge housing and all the other non-reachable parts of the printer.
4. Try a toner vacuum: you can use a toner vacuum to clean the toner head. Toner vacuums can suck out all the working as obstacles to the printer. Keep the vacuum nozzle for at least 3 seconds for each shaft.
5. Clean the corona wires and the paper roller: Pour a cotton swab into rubbing alcohol and find the corona wires. With the help of the cotton swab, clean the wires and make sure to corona wires as well. this will help to improve the transferring static charge to the paper. Take another swab and scrub the feed roller in a circular motion and clear all the dust that gathered by the roller.
6. Reassemble: After cleaning the printer, reassemble the machine. Don’t put pressure while putting in the parts. They should go in gently without any pressure.
Keeping your printer clean and taking good care of it may not be enough to keep it from breaking up. Make sure to hire a good professional repair service when you are about getting your printer repaired.
We have mentioned everything above here and now you are thinking how to take printer services Melbourne nearby your residence. Thankfully, there are a number of Melbourne printer repair center, whereas you can up to date your printer. On the other hand, there are a few local service owners who are not that much experienced. Therefore, make sure the printer repairs Melbourne service provider has at least 5 years of experience.
